

 Home
Home
 Dealer
Quick Support
 Sales
Sales- +91 8888200022 / +91 7744911119
- Service
- +91 8888044448
 Email
Email- [email protected]
Connect socially


![]()
![]()
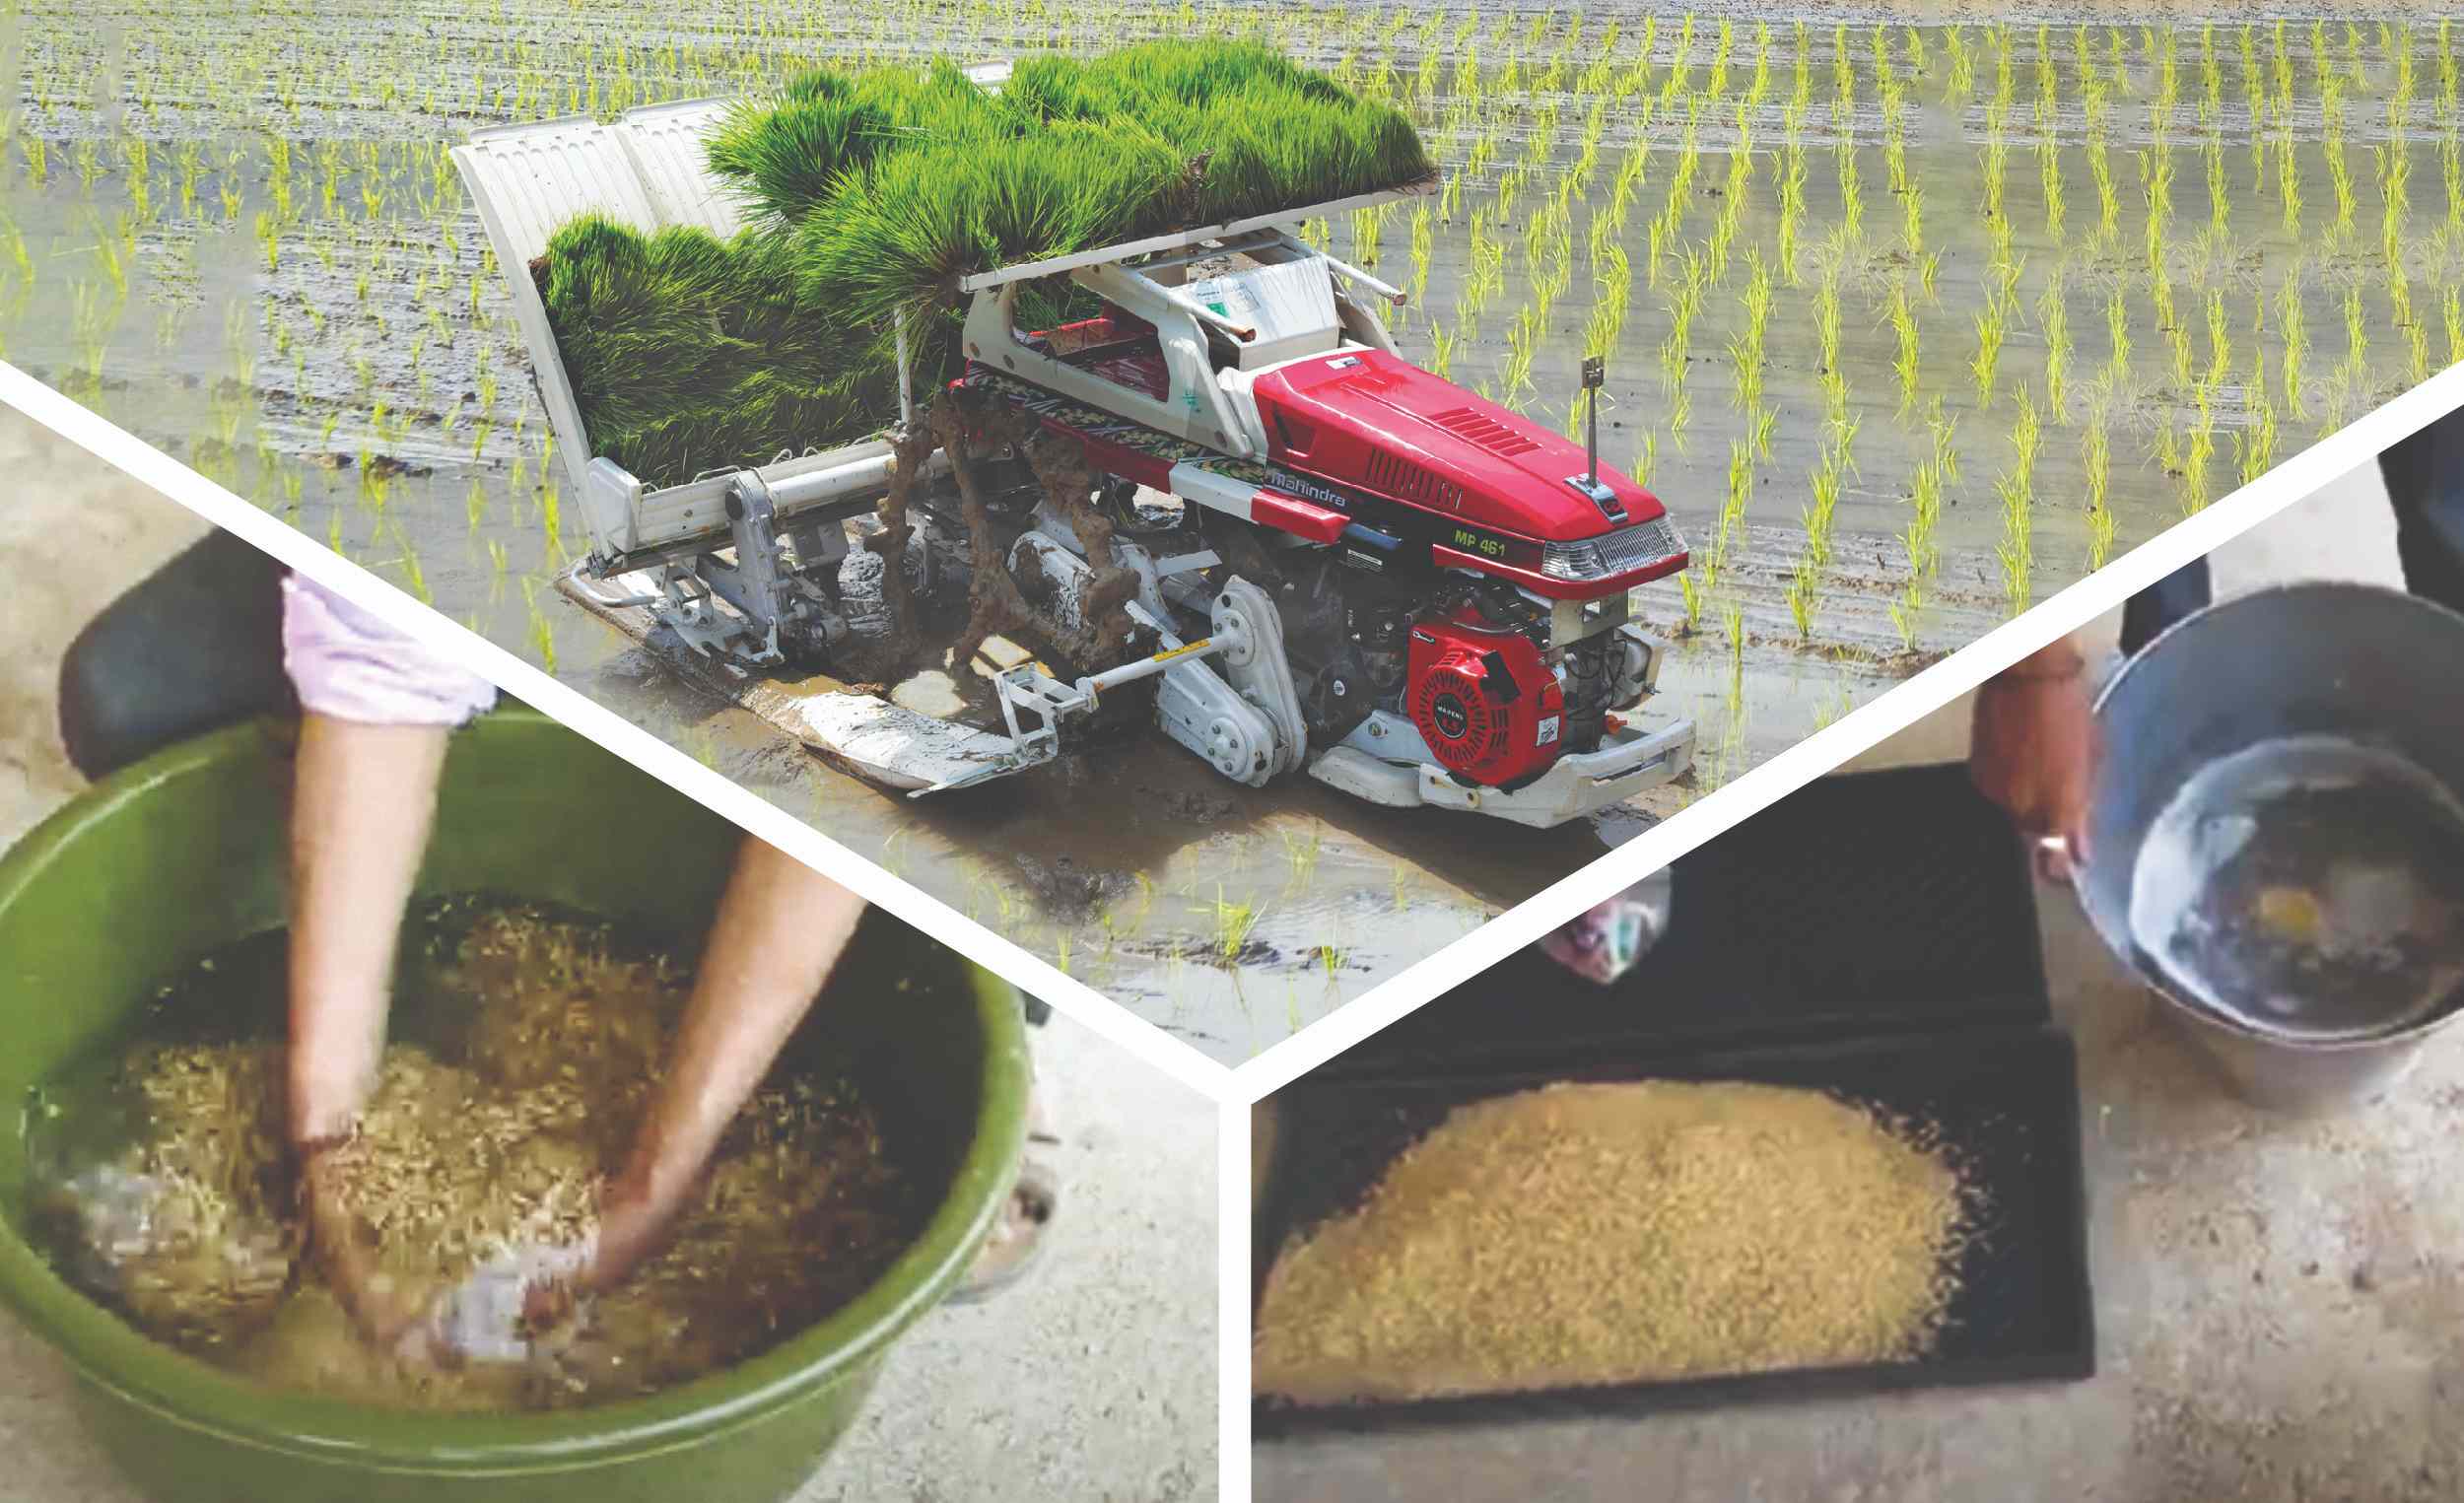
In modern agriculture, the use of machinery is revolutionizing the way we grow crops, making processes more efficient and less labor-intensive. One such innovation is the rice transplanter machine, which significantly streamlines the process of rice transplanting. However, to maximize the benefits of this technology, proper paddy seed preparation is crucial. This blog will guide you through the steps of preparing paddy seeds for transplanting using a rice transplanter, ensuring a healthy and bountiful crop.
Understanding the Rice Transplanter Machine
Before diving into the specifics of paddy seed preparation, it's important to understand the rice transplanter machine itself. A rice transplanter is an agricultural machine designed to transplant rice seedlings into paddy fields. It automates the traditionally labor-intensive process, improving efficiency, ensuring uniform planting, and ultimately boosting yield.
Benefits of Using a Rice Transplanter
There are many benefits of rice planter machine such as:
1. Labor Savings: Reduces the need for manual labor, which is increasingly scarce and expensive.
2. Uniform Planting: Ensures even spacing and depth, leading to better growth and higher yields.
3. Time Efficiency: Significantly speeds up the transplanting process, allowing farmers to cover more area in less time.
4. Cost-Effective: Though the initial investment is high, the reduction in labor costs and increase in yield make it economically viable.
Preparing Paddy Seeds for Transplanting
Proper seed preparation is essential to ensure the success of transplanting and the subsequent growth of the rice plants. Here are the steps to prepare paddy seeds for transplanting using a rice transplanter machine:
1. Selection of Seeds
The first step is to select high-quality seeds. This involves choosing seeds that are:
- High Yielding: Choose varieties that are known for their high yield potential.
- Disease Resistant: Select seeds that are resistant to common rice diseases to minimize crop loss.
- Adaptable: Opt for varieties suited to your local climate and soil conditions.
2. Seed Treatment
Treating the seeds before sowing is crucial to protect them from pests and diseases. Common seed treatments include:
- Hot Water Treatment: Soak the seeds in hot water (52-54°C) for 10-15 minutes to kill pathogens.
- Chemical Treatment: Use fungicides and insecticides to treat the seeds. Common chemicals include carbendazim, thiram, or captan.
3. Seed Soaking
Soak the seeds in water to soften the seed coat and promote uniform germination. Here’s how:
- Duration: Soak the seeds for 24-36 hours.
-Aeration: Ensure the water is well-aerated to provide sufficient oxygen to the seeds.
4. Pre-Germination
Pre-germinating the seeds ensures a uniform and rapid growth when transplanted. Follow these steps:
- Incubation: After speaking, drain the water and incubate the seeds in a warm, moist environment for 24-48 hours until they start to sprout.
- Monitoring: Regularly check the seeds to ensure they don’t dry out or get overly soaked.
Preparing the Nursery Bed
A well-prepared nursery bed is essential for growing healthy seedlings that are ready for transplanting. Here’s how to prepare it:
1. Bed Preparation
- Soil Selection: Choose fertile, well-draining soil.
- Bed Size: Depending on the size of your rice transplanter, prepare beds that fit the machine’s specifications.
- Bed Height: Maintain a bed height of 5-7 cm to prevent waterlogging and facilitate easy seedling removal.
2. Sowing the Seeds
- Broadcasting: Evenly broadcast the pre-germinated seeds over the nursery bed.
- Seed Rate: Use a seed rate of 100-150 grams per square meter.
- Covering: Lightly cover the seeds with soil or a thin layer of compost to protect them and ensure good soil contact.
3. Water Management
Proper water management is crucial in the nursery stage to promote healthy seedling growth.
- Initial Watering: Provide gentle irrigation immediately after sowing to settle the seeds.
- Subsequent Watering: Maintain a consistent water level of 2-3 cm in the nursery bed, ensuring it doesn’t dry out or become waterlogged.
4. Seedling Care
- Fertilization: Apply a balanced fertilizer (N-P-K) to support seedling growth.
- Weed Control: Regularly remove weeds that compete with the seedlings for nutrients and space.
- Pest Management: Monitor for pests and diseases and treat accordingly with appropriate measures.
Transplanting Using the Rice Transplanter Machine
Once the seedlings are ready (typically 20-30 days old), it’s time to transplant them using the rice transplanter. Here’s how:
1. Preparing the Field
- Field Levelling: Ensure the field is level to facilitate uniform water distribution.
- Water Management: Maintain a water level of 2-3 cm to support the transplanter's operation and seedling establishment.
2. Machine Preparation
- Calibration: Calibrate the rice transplanter to ensure proper spacing and depth of planting.
- Lubrication: Ensure all moving parts are well-lubricated to prevent breakdowns during operation.
3. Loading the Seedlings
- Tray Loading: Load the seedling trays into the transplanter. Ensure the seedlings are uniform in size and healthy.
- Alignment: Properly align the trays to ensure smooth and efficient transplanting.
4. Transplanting Process
- Operation: Operate the rice transplanter along the field, ensuring consistent speed and direction.
- Monitoring: Regularly check the transplanting depth and spacing, adjusting the machine settings as needed.
- Refilling: Keep an eye on the seedling trays and refill them as necessary to avoid interruptions.
Post-Transplanting Care
Proper care after transplanting is essential to ensure the seedlings establish well and grow vigorously.
1. Water Management
- Initial Watering: Maintain a shallow water layer (2-3 cm) immediately after transplanting to support seedling establishment.
- Subsequent Watering: Gradually increase the water depth as the plants grow, ensuring they never dry out.
2. Fertilization
- Initial Fertilization: Apply a balanced fertilizer (N-P-K) soon after transplanting to support root development.
- Top Dressing: Apply additional nitrogen fertilizer at critical growth stages (e.g., tillering and panicle initiation).
3. Weed and Pest Control
- Weed Management: Regularly monitor and control weeds to prevent competition for nutrients.
- Pest Control: Monitor for pests and diseases, applying appropriate treatments as needed.
Conclusion
Utilizing a rice transplanter machine for paddy cultivation can significantly improve efficiency, reduce labor costs, and increase yields. However, the success of this technology hinges on meticulous seed preparation and nursery management. By following the steps outlined in this guide, you can ensure your seedlings are healthy and ready for transplanting, setting the stage for a bountiful rice harvest.
The Mahindra walk-behind rice planter revolutionizes the traditionally labor-intensive, time-consuming, and costly rice transplanting process. This innovative machine offers significant benefits through mechanization, reducing the need for manual labor and associated costs. By ensuring consistent and uniform planting, it promotes healthier and more robust rice yields, with each seedling receiving equal access to essential resources like sunlight, water, and air.
Incorporating modern technology like the rice transplanter into traditional farming practices not only enhances productivity but also paves the way for sustainable and profitable agriculture. With proper preparation and care, the rice transplanter machine can be a game-changer in paddy cultivation, helping farmers meet the growing demand for rice while optimizing their resources.
![]()
![]()